P-18 Manager - Quick Start Step 2 - Enter Lease Information
Select the Run Tickets Tab
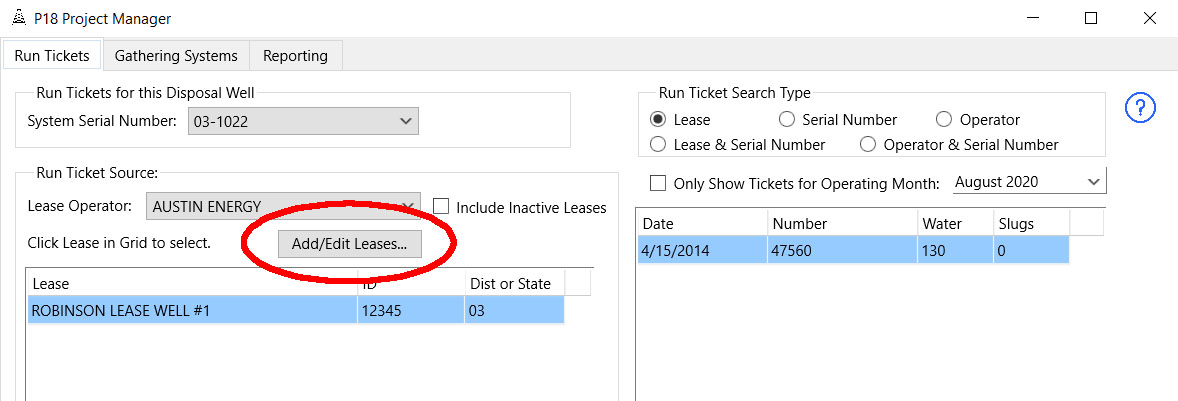
A) In the Run Ticket Source group, press the [Add/Edit Leases...] button.

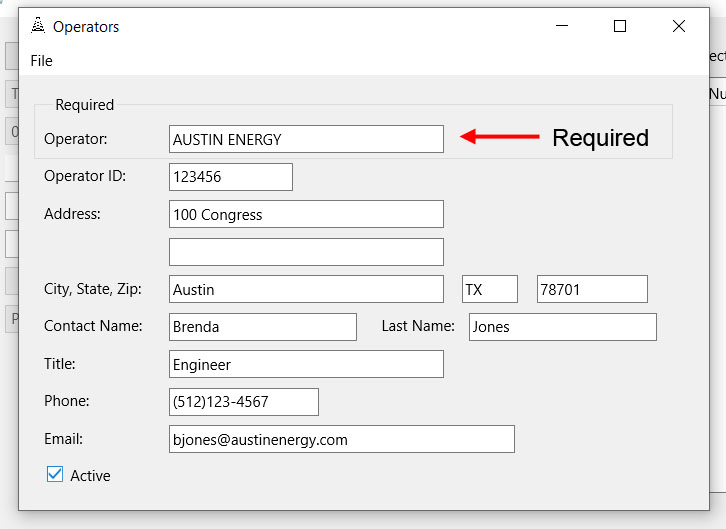
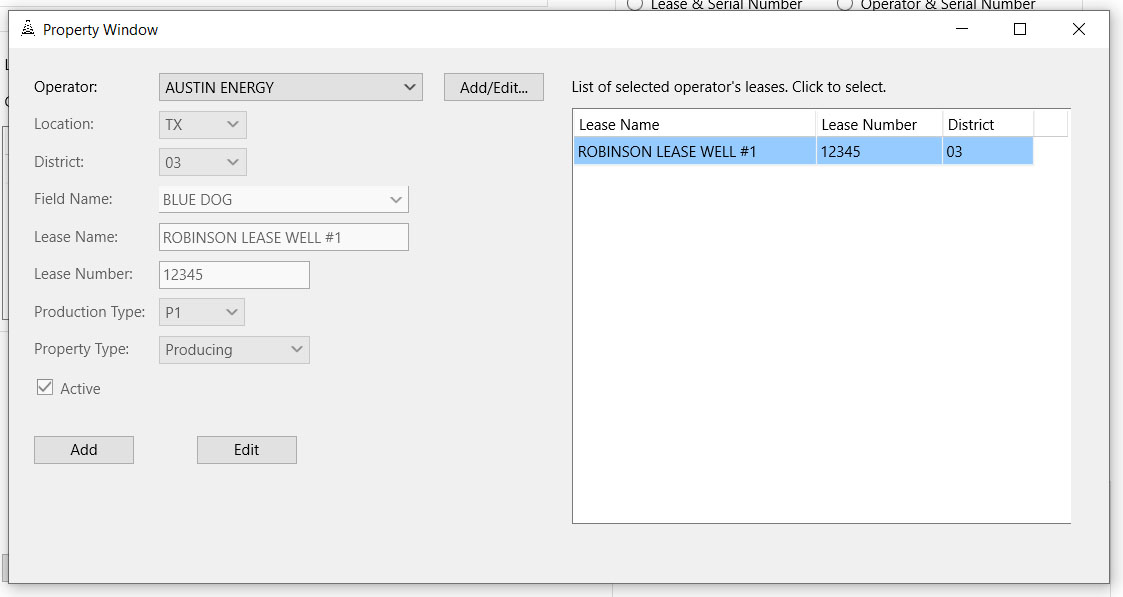
This displays the Property (Leases) Window. You will need to add the lease operators so press the [Add/Edit...] button to the right of Operators dropdown.

Enter all the operators you will be receiving liquids from. Make sure you select File > Save then File > Clear in between adding operators. You are only required to enter the operator name. When you are finished close this window and you will return to the Property Window.

B) Press the Add button to begin adding a lease. The data entry fields are:

- Operator - Select one. (Required)
- Location - Select the state where the lease is located. (Required)
- District - Select the district the lease is located in. (Required for Texas leases)
- Field Name - Select a Field Name form the list or enter a new one. (Required for Texas leases)
- Lease Name - Enter the Lease Name. (Required)
- Lease Number - Enter the Lease Number.
- Production Type - Select the production type. (Required for Texas leases)
- Property Type - Select if the lease is Producing or Non-Producing. (Required for Texas leases)
- Active - This determines if you are receiving liquids from the lease. You can edit a lease later and make it inactive if you stop receiving liquids from it.
- NOTE: Edit leases by first selecting an [Operator]. This displays the list of leases for that operator. Click on the Lease in the grid to select it. The Press the [Edit] button to edit it.


